After we created in Part 1 the transparent tables and in Part 2 all BAdI implementation, we can now maintain and create our SPO. First we have to fill our table ZSPOPATTERN with a PATTERNID and a corresponding INFOOBJECT. Go to the se16 and create a new table entry. As PATTERNID enter a unique id for example CALYEAR and as INFOOBJECT 0CALYEAR. For TXTLG and TXTSM enter a useful text. Depending on how many InfoObject are used for a partition, create the other pattern.

After we filled ZSPOPATTERN, we can now fill ZSPOINFOPROV. As SPONAME enter the technical Name of the SPO. As PATTERNID1 to PATTERNID4 enter your previous created pattern. For example Y_TM as SPONAME and CALYEAR as PATTERNID1.

The next table is ZSPOCRITERIA. Enter the previous created PATTERNID, a PARTGROUP, a LOWVALUE and if necessary a HIGHVALUE. For example:
- PATTERNID - CALYEAR
- PARTGROUP - 1
- LOWVALUE - 2016
For 2017 use PARTGROUP 2, for more explanation see the screenshot below.

The last table is ZSPODTP. Enter a SPONAME, OBJTYPE, LOGSYS, DTPTEMPLATE and DTPTEMPLATEID. The DTPTEMPLATEID can be found in table RSLPO_DFG_DTPTPL. For example:
- SPONAME - Y_TM
- OBJTYPE - ODSO
- OBJNAME - YTM01
- LOGSYS - T04CLNT100
- DTPTEMPLATE - DSO FULL
- DTPTEMPLATEID - 00O2TGUDQNX7RY71D737H5IZ2

After the initial maintenance is done, we can go to the transaction RSA1. We can either maintain our SPO directly or under Administration you find the Mass Activation of BAdI SPOs. The first new partion will be created directly and the second and third under Mass Activation of BAdI SPOs. When you start from scretch you click on Change Partitions to create your new partitions. Now you can choose your criteria.
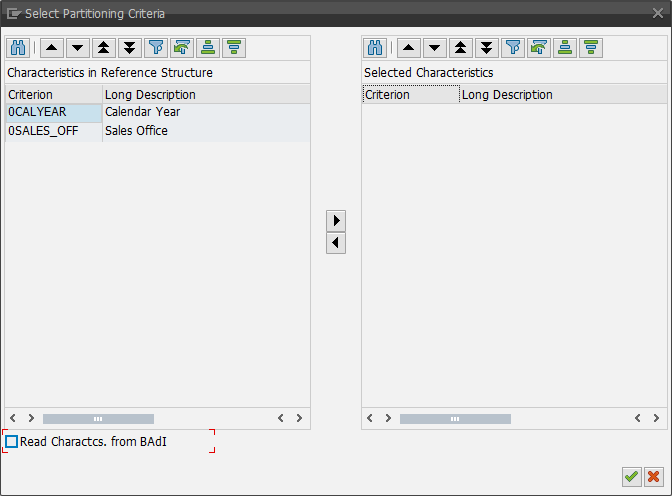
As you can see on the screenshot below, when you select Read Charactcs. from BAdI, the InfoObject 0CALYEAR is automatically add as criteria.
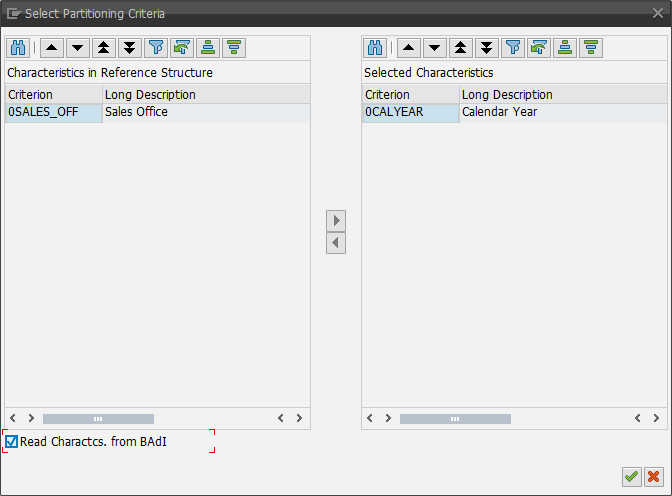
In the screenshot below you see the partition 1 is automatically added with the year 2016.

Now we can activate our SPO and see, that the partition 1 is created. You can now add your new partitions either by clicking on Build Version From or via Mass Activation of BAdI SPOs. I choose the second way to show you how can activate multiple SPOs at once. Goto Administration >> Mass Activation of BAdI SPOs.

As you can see in the screeshot above, our SPO find new partitions. With the function Version Comparison you can compare the actual version with the new.
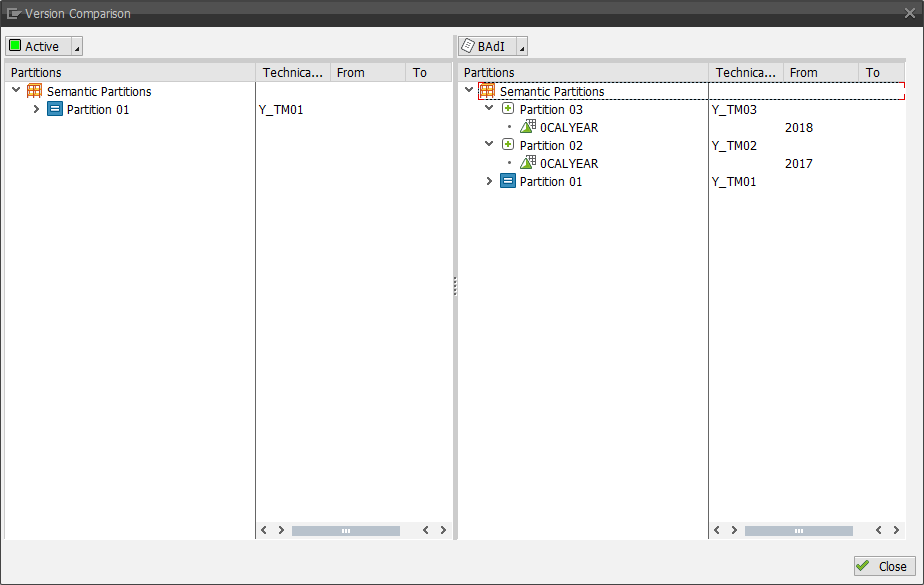
As you see, the two new partitions for 2017 and 2018 will be created. By click on Activate, the partitions are created.

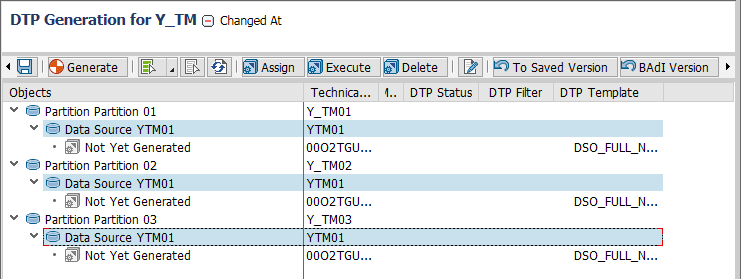
Now our SPO is up to date and all partitions are created. If you need for example 2019, you have to maintain the table ZSPOCRITERIA and go back to the Mass Activation of BAdI SPOs. The last part is now to create the DTPs. Go to the SPO and open it in change mode. Click on Create Data Transfer Processes. You will see the following screen.
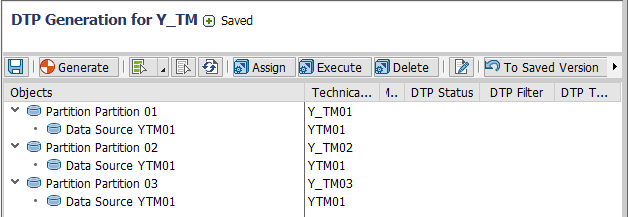
Select your partitions and click on the button BAdI Version.

The DTPs automatically appear and you only have to generate them.
That's it. Your SPO and associated DTPS can be created via BAdI. I tested it with a Business Warehouse 7.31 SP18, maybe it is a little bit different in a higher release.
These posts might also be interesting:
author.
I am Tobias, I write this blog since 2014, you can find me on twitter and youtube. If you want you can leave me a paypal coffee donation. You can also contact me directly if you want.


Write a comment